If you open it in a notation editor, you can play it back while watching the notes, and adjust the volumes and tempo to suit yourself.
Where can I find a notation editor?
If you already write music on your computer, the application you use can probably import MIDI files. Use that.
If you don’t write music yourself, I recommend starting with MuseScore. It’s free, quite powerful, and runs on most Windows, Mac OS and most major Linux distributions.
If you don’t want to install anything new on your computer, you can also use the demonstration version of NoteFlight – a notation editor that runs right in your Web browser.
Visit musescore.org to download and install MuseScore.
Visit www.noteflight.com to try out NoteFlight in your Web browser.
Once you have the score editor of your choice open, you will need to do three things:
- Import your MIDI file.
- Adjust the tempo to match your conductor (or less, if you need to start slower).
- Adjust the volume to emphasise your part.
Sources
The MIDI file being in the examples that follow comes from Henry Purcell’s “King Arthur”. A scan of an 1843 publication of the score is available from the International Music Score Library Project: IMSLP – King Arthur, Z.628 (Purcell, Henry). In 2012 Jean-Charles Malahieude typeset the 1843 publication in LilyPond ((See What is a LilyPond file? for more information about what LilyPond is and why it matters.)). You can download the LilyPond source files, along with PDF and MIDI files generated from that source, from ChoralWiki – King Arthur (Henry Purcell). The “MIDI file” link there is actually a zip file containing a separate MIDI file for each tune.
The file used here is for Act 2, “Come, follow me”, which should have the filename “Arthur-Act2-06_Come_follow_me.mid”. The example screenshots all show emphasis on the Tenor part, since I received a specific question about that. However, any part or parts may be brought forward or pushed back in this way.
Application-specific instructions
Finale NotePad
Go to “File” > “Open” and choose your MIDI file. Finale NotePad doesn’t ask for any MIDI import settings, but does take some time to completely import. Make sure you don’t click anywhere while the “MIDI File Status” window is visible, or you will not end up with the complete file.
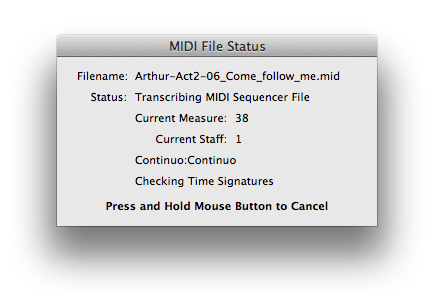
Finale NotePad 2012 imports a MIDI file.
In theory you can change the tempo in the Playback window (“Window” > “Playback Controls” if it is not visible). However, while this works for music created in Finale, I found it didn’t work for MIDI files imported into Finale NotePad 2012. Most likely the imported MIDI file includes an invisible tempo setting ((Sibelius imports but hides the tempo definitions from MIDI files, but they may still be accessed and changed. The full version of Finale probably also works in this way.)).

Finale NotePad 2012 playback (accessed through “Window” > “Playback Controls”)
To change instrument volumes, go to “Window” > “ScoreManager” and type new values into the “Vol” fields. You may do this while the score is playing.

Finale NotePad 2012 instruments (accessed through “Window” -> “ScoreManager”) with Tenor volume maximised and all other volumes halved
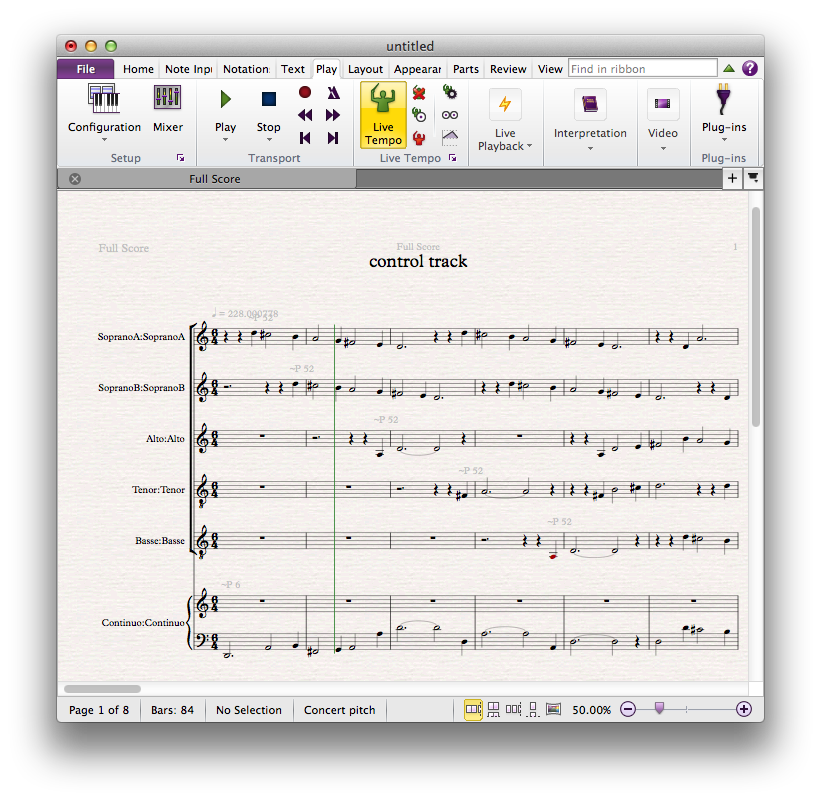
MuseScore
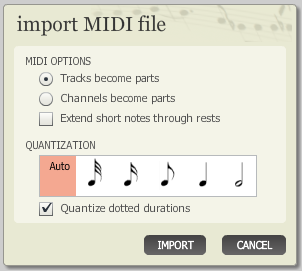
Go to “File” > “Open” and choose your MIDI file. MuseScore does ask for the “Shortest note on import”. Set this to the smallest possible value (1/128) for the most accurate representation of the rhythms in the file ((This may result in unusual notes on your screen. If are planning on editing the notation instead of just listening to it, you might choose a larger fraction, which “rounds off” unusual rhythms to suit.)).
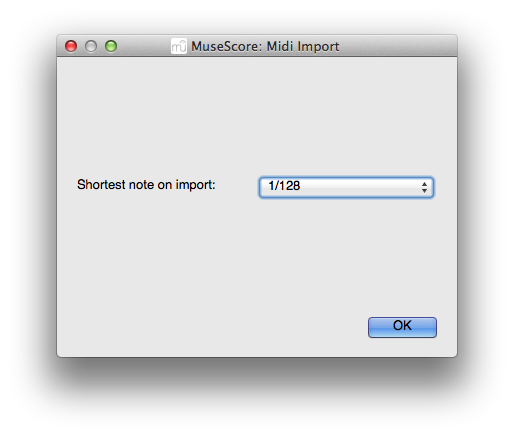
MuseScore 1.3 MIDI Import (set to 1/128 for best rhythm accuracy)
You can change the tempo permanently by adding tempo text (“Create” > “Text” > “Tempo…”). Your computer ignores the text here – all it sees is the the “BPM” number. You can also change the tempo during playback (“Display” > “Play Panel”). For details about both options, see the MuseScore Handbook – Sound and playback – Tempo.

Adding tempo text in MuseScore 1.3 (accessed through “Create” > “Text” > “Tempo…”)
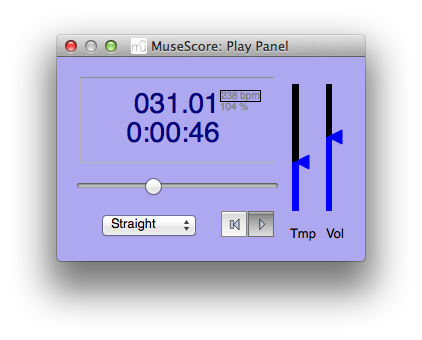
MuseScore 1.3 playback (accessed through “Display” > “Play Panel”)
To adjust volumes, go to “Display” > “Mixer” and adjust the “Vol” values. For details, see the MuseScore Handbook – Sound and playback – Change and adjust sounds – Mixer.
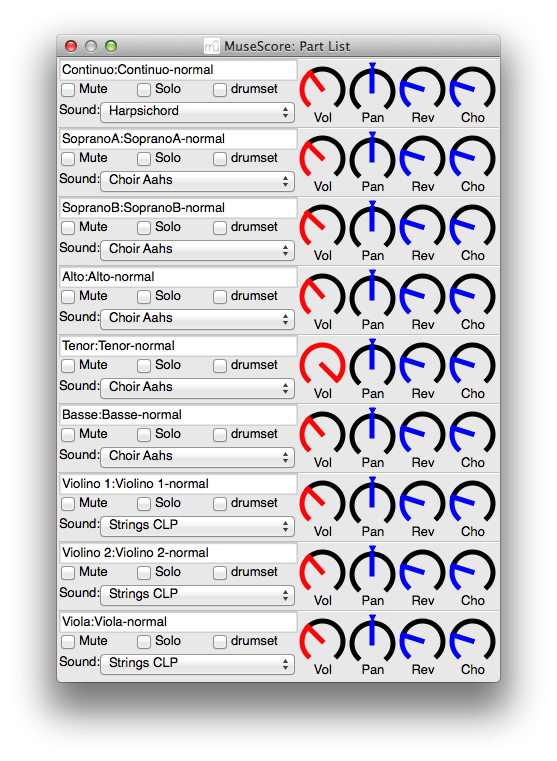
MuseScore 1.3 instruments (accessed through “Display” > “Mixer”) with Tenor volume maximised and all other volumes reduced
NoteFlight
To import into NoteFlight, go to “File” > “Import” and choose your file. The default MIDI import settings should be fine.
NoteFlight 2.10 MIDI import settings
To adjust the tempo, look at the toolbar in the lower left and change the number. Click on the note symbol to change the beat. If you selected part of your score first, the specified tempo will only affect the selected bars. For details, see NoteFlight Help – Changing the Tempo.
NoteFlight 2.10 playback settings
You can change instrument volumes in NoteFlight, but only in the paid “Crescendo” version or the free but non-saving demonstration.
To change instrument volumes, look once again at the toolbar in the lower left and click on the ![]() symbol. Then adjust the volumes to suit. The sliders measure in Decibels (dB). Decibels are a logarithmic unit, where -10 dB will halve the volume and +10 dB will double it. For details, see NoteFlight Help – Changing the Playback Mix.
symbol. Then adjust the volumes to suit. The sliders measure in Decibels (dB). Decibels are a logarithmic unit, where -10 dB will halve the volume and +10 dB will double it. For details, see NoteFlight Help – Changing the Playback Mix.

NoteFlight 2.10 Mixer with Tenor volume increased and all other volumes decreased
Sibelius
Go to “File” > “Open” and select your file. You will face two entire tabs of MIDI import settings. Most can be left alone, but for accurate rhythms, go to the “Notation” tab and make sure that “Adjust rhythms” is not checked.
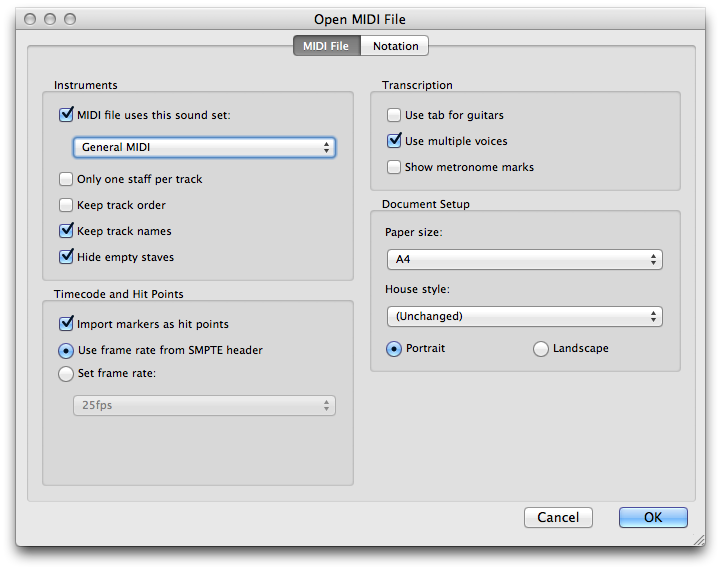
Sibelius 7 MIDI import settings tab 1 (“MIDI File”)
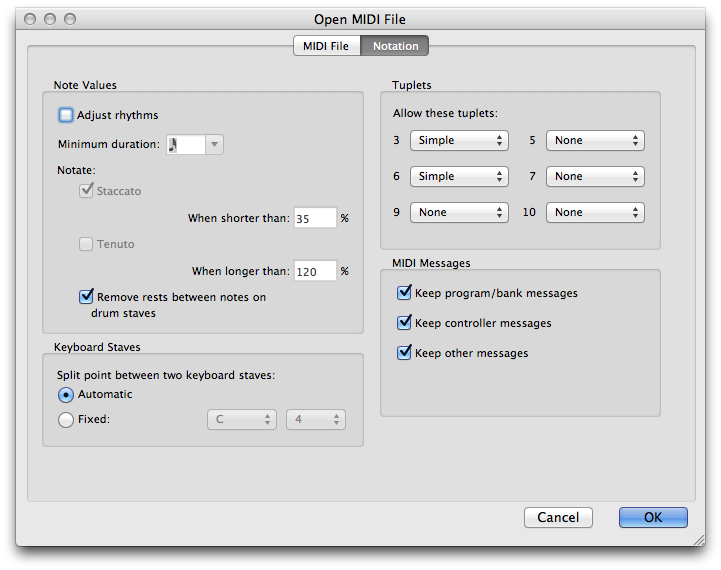
Sibelius 7 MIDI import settings tab 2 (“Notation”) with “Adjust rhythms” unchecked
You should find that your notation starts with hidden (greyed out) tempo text ((Sibelius often adds a decimal point and a lot of digits to the tempo. MIDI files define tempo in microseconds per beat, not beats per minute. The excessive precision is probably Sibelius trying to exactly represent the tempo defined in the MIDI file.)) Change the number to change the tempo. It’s also good to make the text visible (“Home” tab > “Hide or Show” > “Show in All”).
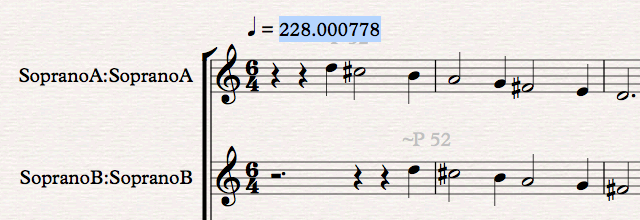
Editing tempo text in Sibelius 7
To change volumes open the Mixer. Go to the “Play” tab. If “Mixer” is not highlighted, click on it.
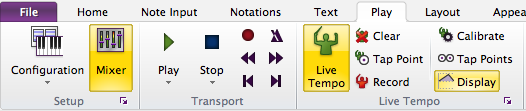
Sibelius 7 toolbar with the “Mixer” button selected
Once the Mixer is visible, drag the sliders to change volumes.
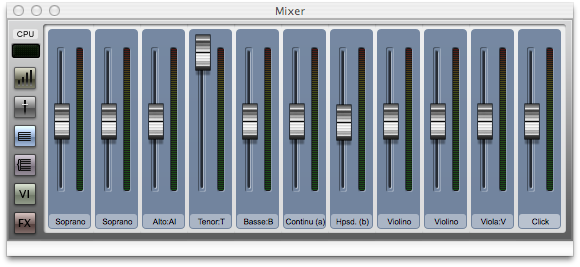
Sibelius 7 mixer with Tenor volume increased, all others decreased
Other applications
In general:
- You should be able to import MIDI files through the “File” > “Open” option. However, if there is a separate “File” > “Import” option, try that instead. After you choose your MIDI file, you may be asked for MIDI import settings. The defaults usually work well enough, but if you hear odd rhythms, you may need to change the import settings to reduce “Quantisation”.
- Depending on the application, tempo may be changed through adding tempo text to the score, changing the playback speed, or both.
- Some applications make volume controls part of instrumentation, while others consider them part of playback.
Why does the imported MIDI file sound terrible?
Because computer MIDI synthesisers always sound terrible, and probably always will. No one but musicians needs MIDI any more, and serious musicians use a separate synthesiser.
Why does the imported MIDI file look terrible?
Your imported MIDI file may not look like the score. There are many ways this can happen. The short answer is that MIDI is an audio format, not a notation format, and does not contain some information needed to properly display the music. There’s a whole other post on this, at Why didn’t this MIDI file import properly?
If you’re singing, the most obvious loss is all the lyrics. You’ll need to have your own sheet music to hand, or notate them yourself.
Another common problem is that anacrusis notes may start at a full bar, displacing barlines for the entire piece.
Visual comparison
It may be useful to see how different applications display the sample piece. One page of one piece is hardly a comprehensive test, but some features stand out.
- Only MuseScore decided to use a D major key signature; the other three applications used accidentals everywhere.
- Finale Notepad and NoteFlight both chose to represent the note between C♮ and D♮ as D♭. Having made the decision to use accidentals, C♯ would be right more often than not. NoteFlight also did this to the note between F♮ and G♮, showing it as G♭.
- Sibelius correctly decided to put the part named “Tenor” on an suboctave treble clef. Finale NotePad and MuseScore both used treble clefs, while NoteFlight used a bass clef.
- MuseScore and NoteFlight made some odd choices in representing sustained notes in 6/4 time. They turned 5 sustained crotchets into a semibreve tied to a crotchet, where Finale NotePad and Sibelius used a dotted minim tied to a minim.
- MuseScore made even stranger choices for rests, turning 5 notes of rest in 6/4 time into a crotchet rest followed by a semibreve. It also represented whole bars of rest as a minim followed by a semibreve. In circumstances other than MIDI import it does correctly display empty bars with a semibreve rest, and selecting and deleting those bars here has the same effect.

Purcell’s “King Arthur”, edited by Edward Taylor and published in 1843, showing the first lines of “Come, follow me”

Purcell’s “King Arthur”, typeset in LilyPond by Jean-Charles Malahieude in 2012, showing the first lines of “Come, follow me”
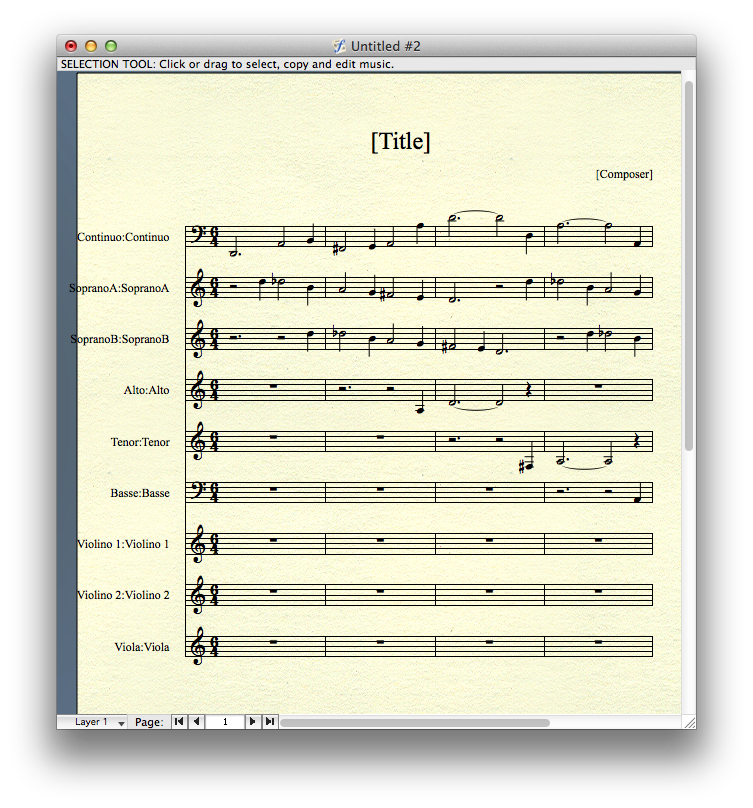
Finale NotePad 2012 displaying the first page of “Come follow me”

MuseScore 1.3 displaying the first page of “Come, follow me”
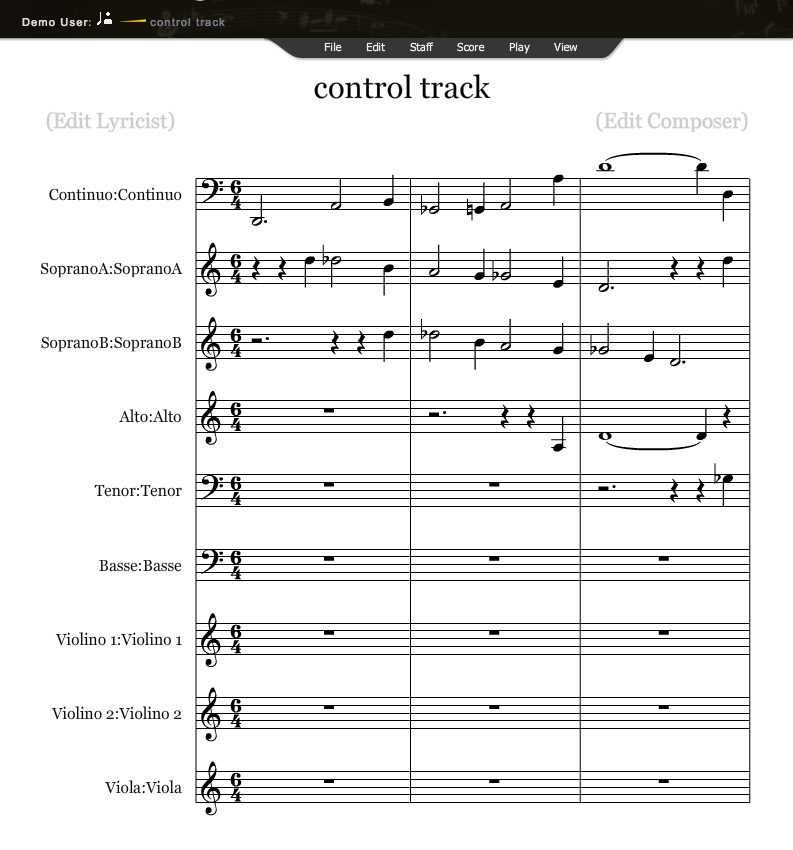
NoteFlight 2.10 displaying the first page of “Come, follow me”
Sibelius 7 displaying the first page of “Come, follow me”