Most likely because it is a data CD containing audio files, not a music CD containing audio tracks.
Check the basics first
It is also possible that your computer isn’t burning CDs properly. See Why does the music CD I burnt on my computer skip when I play it?
If you are sure the CD does indeed work in computers, it is probably a formatting problem.
Music CD, meet data CD
Music CDs contain audio tracks, making them distinct from data CDs, which contain files and folders. It may help to think of music CDs as a special type of filesystem, as described in Why can other computers write to this memory stick, but mine can’t?
The music CD “filesystem” contains no files and no folders – just a sequence of audio tracks.
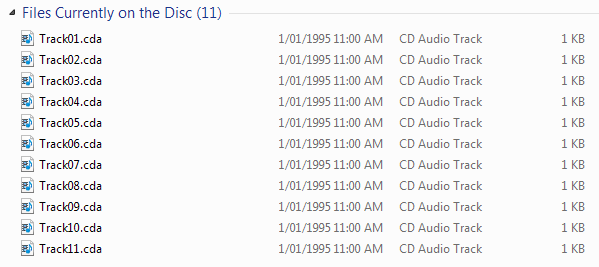
This is not immediately obvious, because if you put a music CD in your computer, it will still display a list of “files”. On Windows, these appear as “CD Audio Track” files, with a .cda extension((For more about file extensions, see What is a file extension? Why does it matter?)). Windows uses these 1 kilobyte files as placeholders for the actual music tracks. Do not attempt to copy them, as at best you will create broken links. If you want to copy the audio tracks from a music CD to your computer, rip it in Windows Media Player or iTunes.
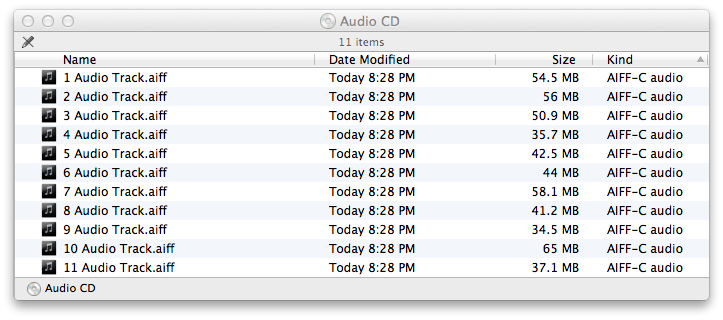
However, Mac OS does something that is both clever and confusing. If you open a music CD in the Finder, it shows “AIFF-C Audio” (.aiff extension) files, each many megabytes.
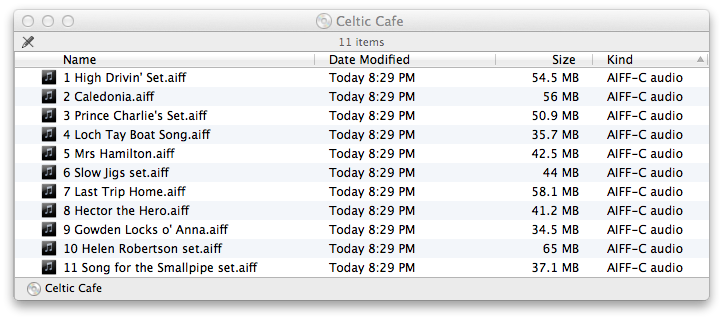
If iTunes is running, has an Internet connection and your music CD is in its database, it will shortly update those filenames with the actual track names ((The CD used here for demonstration purposes is by the Scottish folk band Taliska (www.taliska.info). Hommus MacFadyen recommended them, and I know of no more trustworthy character.)).
If you copy these .aiff files to your computer, you will have audio files you can listen to. Were they on the music CD all along? No, Mac OS “ripped” the CD tracks into audio files when you copied them.
How can I tell the difference between an audio CD and a data CD?
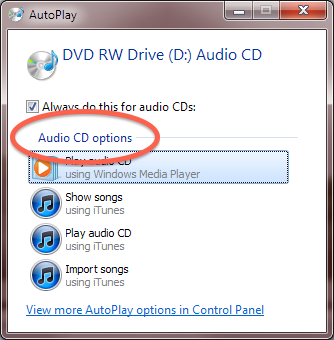
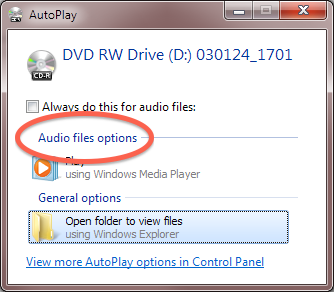
Windows considers all CDs to have the filesystem “CDFS”. However, if the “Autoplay” window appears, you will see a difference between “Audio CD” and “Audio files”.
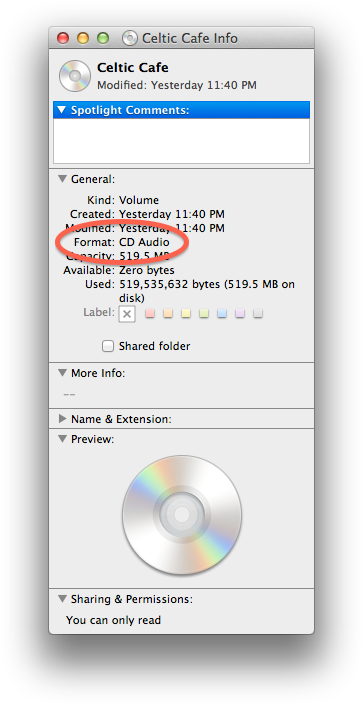
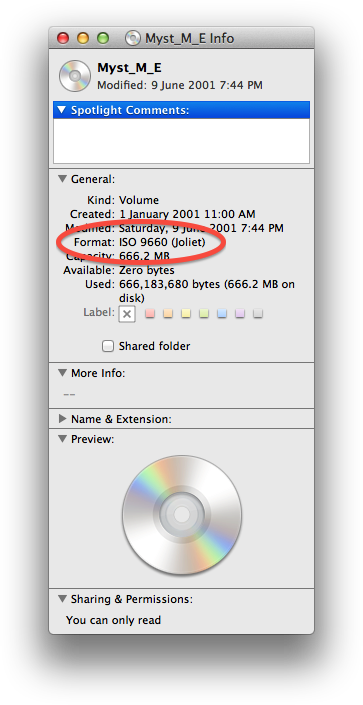
In Mac OS, you can select the disc on your desktop, then go to the “File” menu and select “Get Info”. Look at the “Format” field. For a music CD the format will be “CD Audio”, while data CDs will most likely be “ISO 9660” ((Wikipedia entry on ISO 9660)) or “ISO 9660 (Joliet)” ((Wikipedia entry on Joliet (file system) )). Data CDs may also appear to have “Mac OS” or “Mac OS Extended” format.
If you aren’t creating audio CDs, many CD players won’t know what to do with the discs you burn.
I have a data CD. Some CD players can play it, but some can’t. How do they do that?
Some modern CD players are smart enough to recognise recognise data discs and decode any audio files on them. However, even these smart players can often only decode MP3-formatted files. This is a problem because, by default, Windows Media Player creates WMA (Windows Media Audio) ((Wikipedia entry on Windows Media Audio)) files, while iTunes creates AAC (Advanced Audio Coding) ((Wikipedia entry on Advanced Audio Coding)) files.
You can change the default audio format in Windows Media Player or iTunes, and convert existing files to that format ((If you are using iTunes, you can also burn an “MP3 CD” regardless of the format of your existing files.)).
However if you want maximum compatibility – to create a disc that will play anywhere – it is still best to burn tracks to a music CD ((Music CDs fit at most 99 minutes of audio. If you want to fit more than that on a single disc, you must use compressed data files, and/or write to a DVD instead of CD.)).
How do I burn an audio CD, and not a data CD?
Windows Media Player
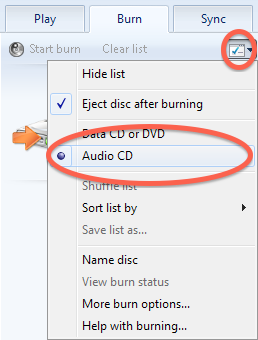
- Select the “Burn” tab.
- Click on the checkmark button on the right.
- If “Data CD or DVD” is selected, click on “Audio CD” to change to that format.
- Click on “Burn”.
iTunes
- Select the playlist you want to burn.
- Go to the “File” menu and choose “Burn Playlist to Disc”.
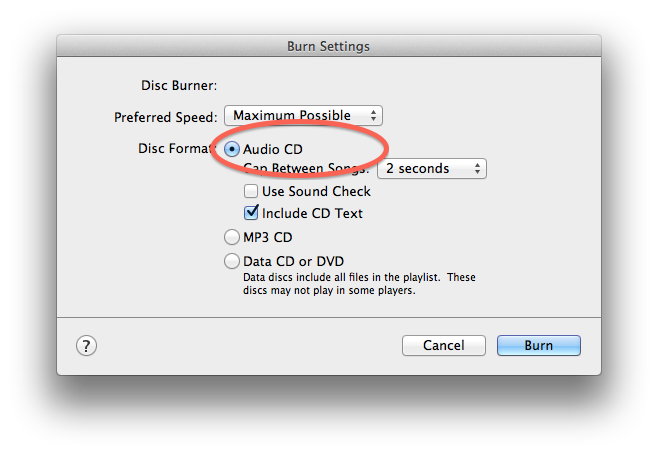
- If the “Audio CD” radio button ((If you’re wondering what a radio button is, and how to be sure you’ve selected the right one, see What is the difference between a checkbox and a radio button?)) highlighted, click on it to change the format.
- Click on “Burn”.
After burning, make sure your disc is of the format you expected, by testing its “Autoplay” description (Windows) or by selecting it and choosing “File” → “Get Info” (Mac OS).
Ancient history supplement
Some games used to combine CD data with audio tracks on a single disc. This meant you could put the game CD in your CD player and listen to the music. In the case of Warcraft II: Beyond the Dark Portal ((Wikipedia entry on Warcraft II: Beyond the Dark Portal)), this was an easy way to discover the track ((Disco Song – Warcraft II: Beyond the Dark Portal [music])) that otherwise only played when “disco” was typed in the game.
This practice ended because CD audio, while high quality, took up a lot of space. With the increasing use of full motion video, CD audio tracks became a disc-filling luxury that publishers couldn’t afford.
